I’m taking part in Arts Canterbury Open Studios weekends (November 25th & 26th and December 2nd & 3rd). Rather than opening up my studio, I’m sharing a local community space with four other artist friends. I’ll be taking some work that is not for sale and some that is. I’ve spent most of this weekend preparing for it! I decided that I would like to setup my old 4-shaft loom so that people can have a try at weaving and take something home with them. Using WeaveIT, I came up with an interesting complex twill that is small and shouldn’t be too hard for a novice to weave (see Image 1). I used the shaft circle (1-2-3-4-and back to 1) to develop the pattern and the longest float is 4 ends. At first, I thought that I would weave with a “guide thread” off to the side of the main warp and have a fringe on all four sides.
So I prepared a 4m warp of 8/4 cotton and 67 warp ends
1 natural (guide thread)
5 red (border)
57 black
5 red (border)
1 natural (guide thread)
I dressed the loom at 15epi sleighed 1,2 in 10dpi reed with an on-loom width of 4.5″. The natural threads were spaced 8 dents from the edge warp ends and the entire warp was lashed to the front apron rod (see Image 2). Three header rows were woven to spread the warp ends evenly across the width of the fabric.
Once the piece was woven, I wove 6 picks plainweave, inserted 2 sticks on opposite sheds and wove a further 6 picks of plainweave. I was then able to cut the finished fabric from the loom. However, the fabric was VERY unsatisfactory – it would require some kind of finishing to prevent the final warp and weft threads from falling out of the fringes (see Image 3).
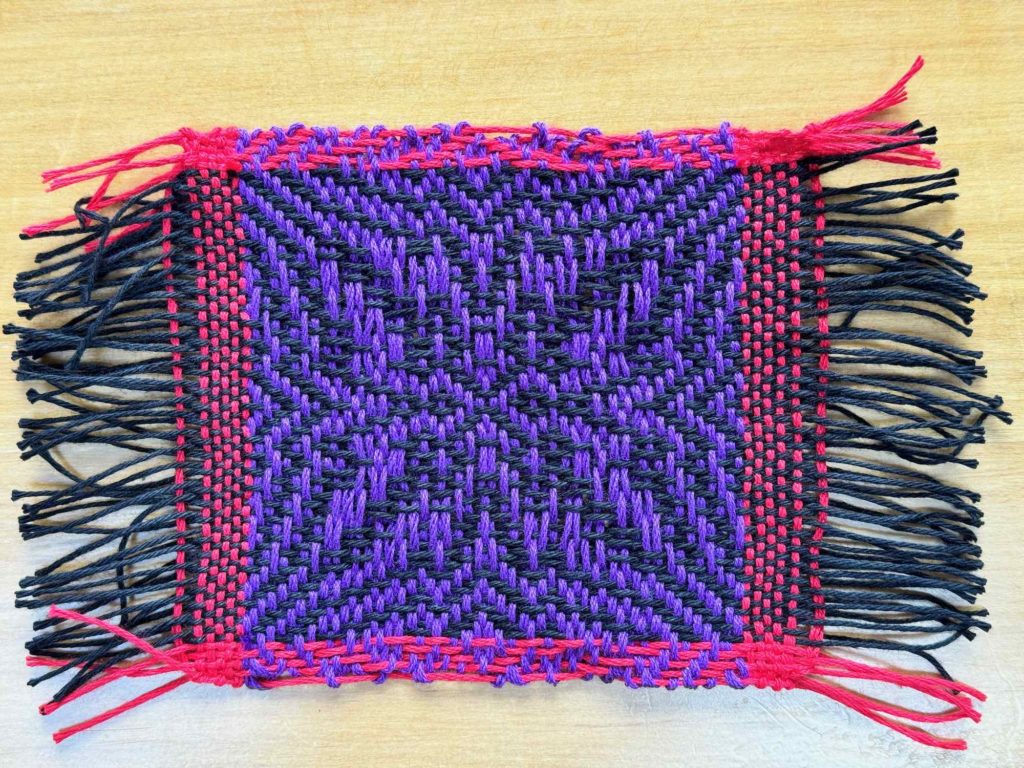
When I tied the 2-stick header onto the front apron rod, I was unable to tighten the warp to weaving tension as the edge warps pulled out of the 2-stick header. So I tied overhand knots into warp end bundles and lashed the bundles to the front apron rod. Because the warp is very small, this doesn’t take long and not much warp is lost. I also removed the weft fringe guide threads (see Image 4) . Then, instead of weaving the red weft as a pattern border, I wove it as plainweave to provide greater fabric stability and dispensed with the red pattern weft picks. I beat the pattern picks quite firmly which, of course, results in a rectangular “squashed” pattern. When this fabric was removed from the loom, it was stable; I also tied the end of the initial and final weft picks to the outside warp ends (see Image 5).
I decided to weave another coaster with only light beating so that the entire pattern can be seen (see Image 6).
I have now tied a small stick to the front apron rod so that I am able to wind the warp closer to the front beam without dealing with a large rectangular stick trying to go over the corner of the front beam.
When a coaster has been woven, I wind the warp on so that the fabric is at the edge of the front beam closest to my body and the warp is a little loose. I then cut the warp along the front edge of the warp beam to get a straight edge. Next, I cut the knots that lash the warp to the apron rod, remove the header picks and knot the end of the first and last weft picks to the edge warps. Once the weft is somewhat stabilised, I trim the tails from the colour change, fold the fabric in half and trim the warp ends that were involved in the knots so that they are even with the other fringe ends.
I hope that this all works next weekend!!!


Added after Day 1 of the event:
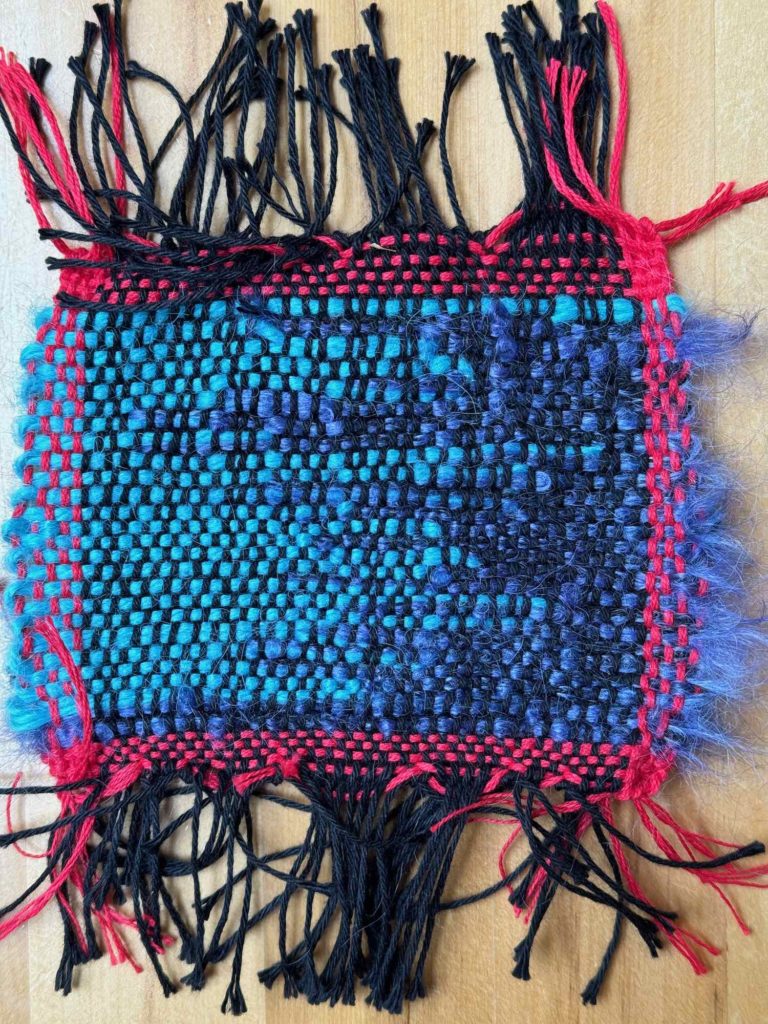
I will take scraps of wool so that people can try weaving a plainweave colourful coaster if they don’t want to attempt the pattern.
Added after the event:
The loom created a lot of interest with many people asking questions about weaving, the time required, how to prepare the loom etc.
Seven coasters were successfully woven – 4 using the pattern threaded on the loom (a 5 year old girl, a 12 year old boy and 2 adult women) and 3 using wool scraps and plainweave (a 12 year old boy, and 2 adult women). Two of the adults are interested in doing more weaving.
Two more were attempted and unwoven (adult woman and adult man)
I think that this was a highly successful activity.