I removed the warp ends from the straight section of reed at the left side (half of the left hand dark pink ends); this colour will now end at the centre of a fan, so I should still get a straight edge.
I then tied the 2-stick header to the apron rod, hemstitched and began to weave.
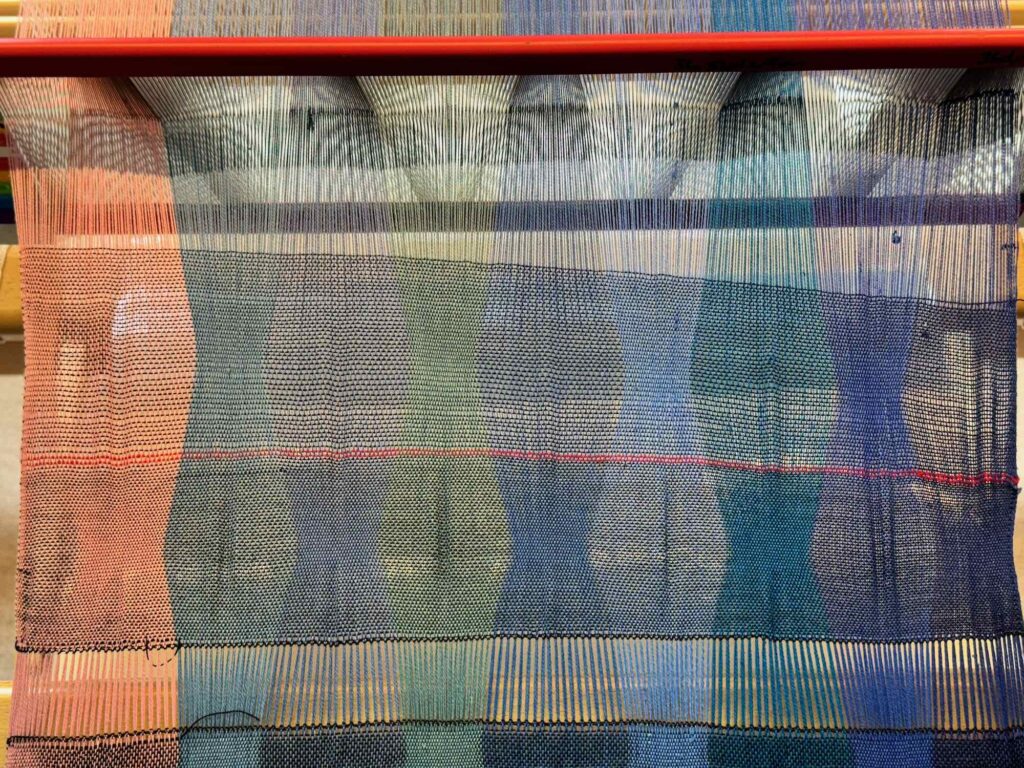
As the warp had been evenly spread across the fabric at the line of hemstitching, quite a bit of deflection was required to get the warp to the width determined by the lower green band on the reed marker. I wove about 10 picks at this position to allow this to happen. Once the warp had moved to the desired widths, I began altering the vertical position of the reed every 4 picks, with 8 picks at each purple band.
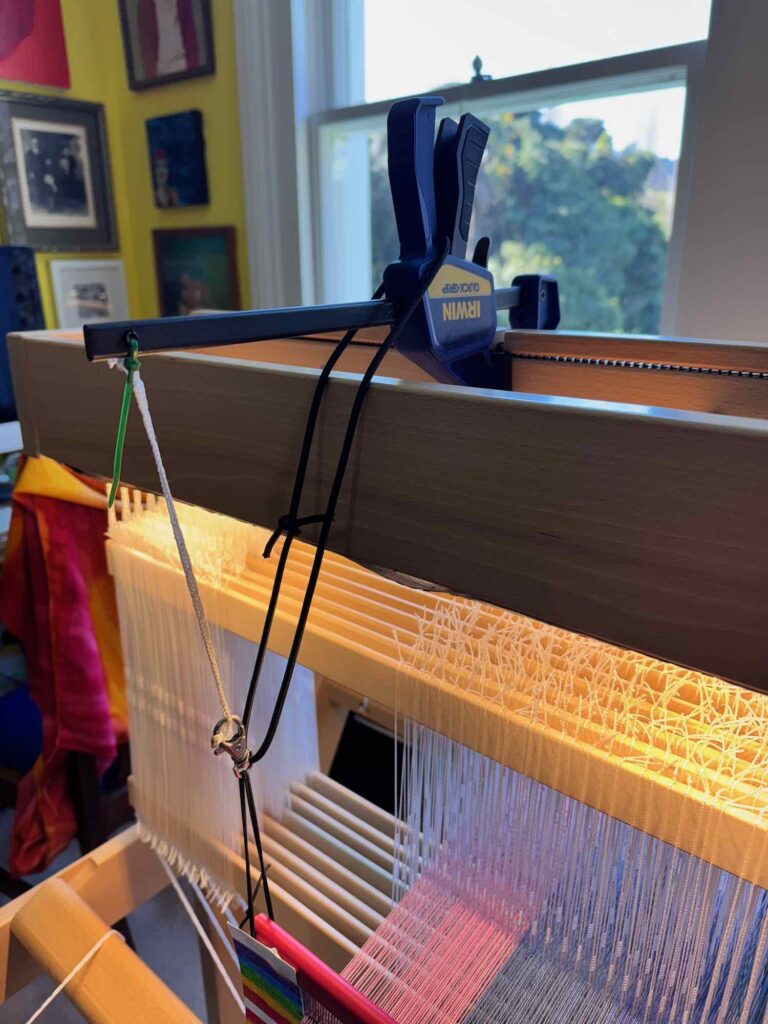
I discovered that the reed was too far from the castle while I was throwing the shuttle; having the reed sit closer to the castle would mean that I get a larger shed for the shuttle to pass through. I tied a length of 3mm bungy cord from the lanyard clip to the clamps on the castle (see image below) – this pulls the reed closer to the castle once I have released it after beating.
There were several knots that I repaired by needle-weaving in replacement thread and a couple of broken warp ends which I repaired with a knot and a T-pin for tensioning.
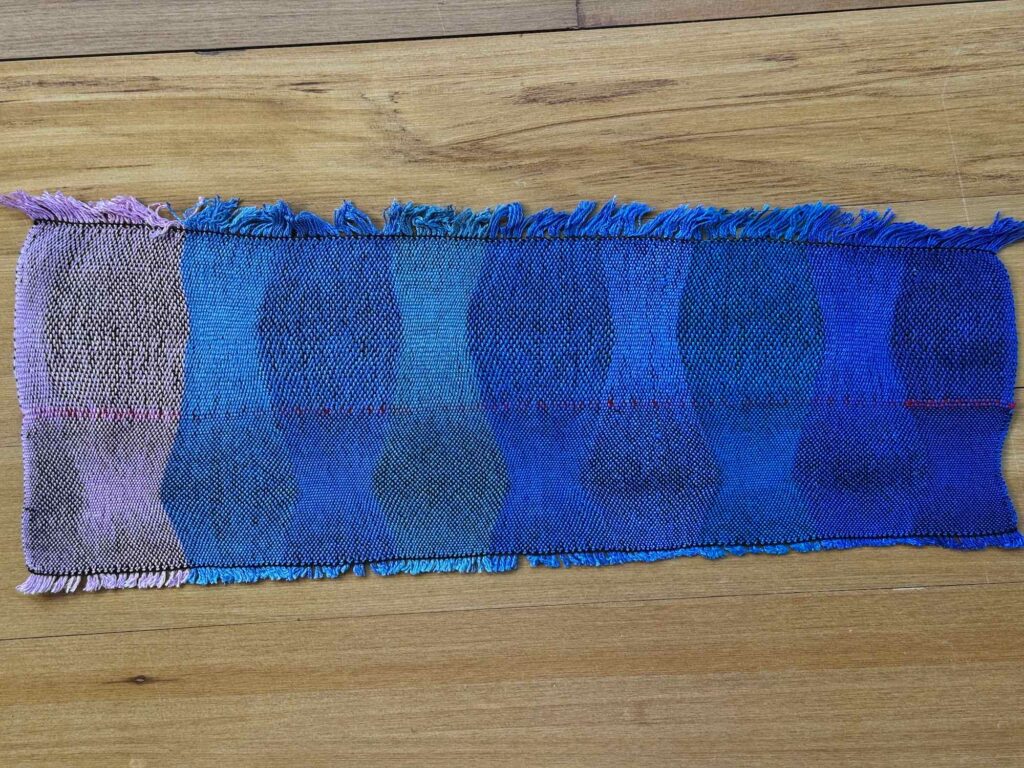
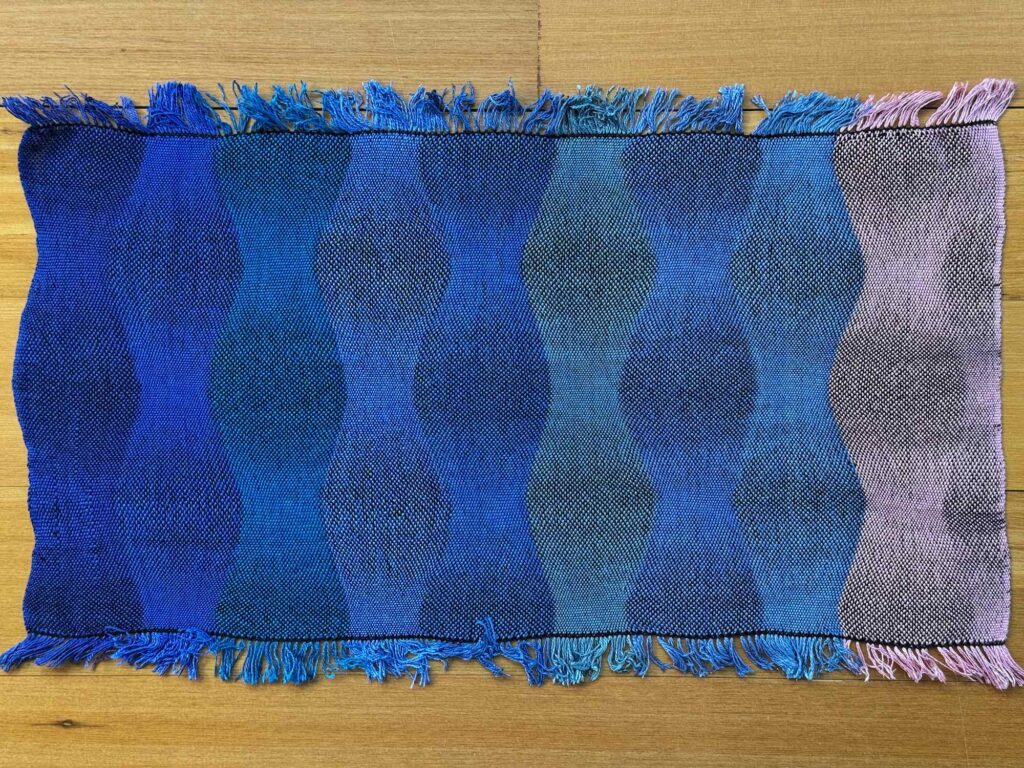
After weaving 2 complete cycles of vertical colour bands from low purple to top purple and back to low purple, I completed the piece by hemstitching – I had ~26cm of woven fabric.
I wove another two pieces in the same manner – hemstitch, 2 cycles of vertical colour bands and hemstitch.
After the 3rd piece, I decided that I had insufficient warp left for a 4th piece, so I used this final section of warp to experiment with a lighter beat.
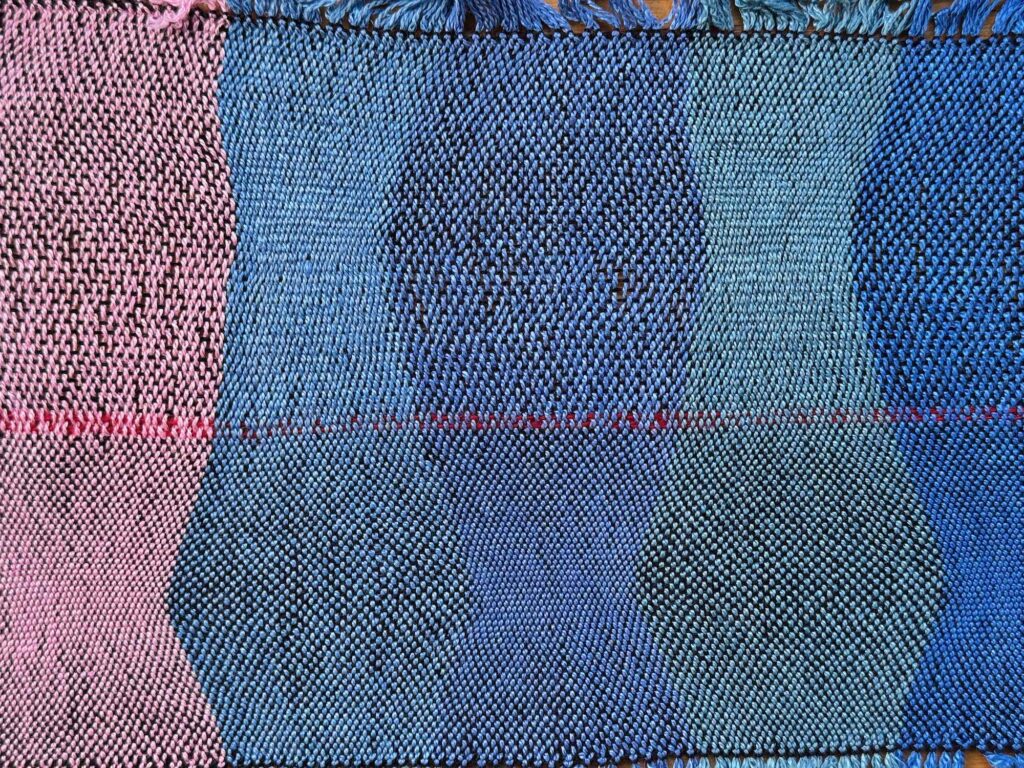
After hemstitching, I began to weave. I discovered that it made more sense to begin weaving at the central vertical colour band (white), as all the fans are the same width at this point.
From there, I wove using a hard double beat to place the weft yarn, and moved the reed up to the top purple band & back down to the central white band. I then threw two picks of red yarn. I finished by using the reed to gently push the weft yarn into place while weaving down to the low purple and back up to the white central band. I finished by hemstitching.
The weft of this piece is quite angled – it is much higher on the left (pink) than on the right (dark blue).
The next step was to cut the completed fabric from the loom, separate the pieces using the rotary cutter, wet finish all pieces, press, dry and trim all loose ends and repair threads.
All three of the final pieces were very similar in size, so I have only recorded a single measurement for pre-wash and post-wash. As you can see in the table below, all pieces were wider AFTER wet-finishing. I did tug at the edges of each piece to help them dry squarely, this must have stretched them out.
When I examined the beat experiment piece, I decided that I prefer the look of the hard beating. The fabric is more even, there is less “wobble” in the warp threads.
| Width (weft) | Length (warp) – Pink | Length (warp) – Blue | |
| Pre-wash Beat expt. – Hard | 43.5cm | 7.25cm | 6cm |
| Pre-wash Beat expt. – Soft | 41.5cm | 9cm | 7cm |
| Post-wash Beat expt. – Hard | 44cm | 6.75cm | 5.5cm |
| Post-wash Beat expt. – Soft | 42.5cm | 8cm | 6.5cm |
| Pre-wash Final pieces | 43cm | 25cm | 25.5cm |
| Post-wash Final pieces | 44cm | 23cm | 23cm |