I’ve been wanting to play with warp deflection for sometime now. In order to do this, I bought a RailReed from Kadi Pajupuu (www.railreed.ee) as well as a fan reed. After a lot of reading and thinking, I’ve decided to try out the fan reed first.
I began by reading the excellent book “Ondulé textiles: weaving contours with a fan reed” by Norma Smayda, Schiffer Publishing, 2017. I realised that I would need to develop a system for mounting the reed to my Louët David III floor loom.
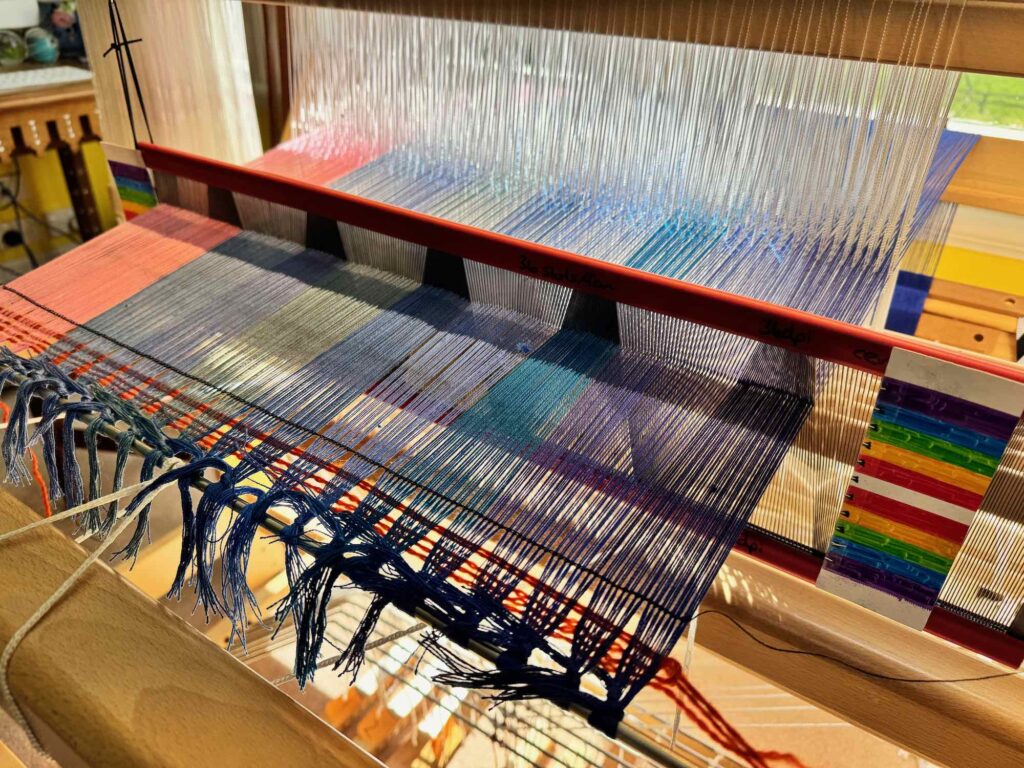
While considering different options, I came up with a wall hanging project to weave with the fan reed. A friend has given me a very old dried seahorse; I had promised to turn this into a work of art. I decided to weave a seascape on which, once finished, I will sew the seahorse.
Fortunately, as I was preparing to start my experimentation with the fan reed, an issue of Complex Weavers Journal (Number 134, February 2024) featuring the Ondulé Textiles Study Group arrived in my mailbox!
As I read through the articles in the Journal, I decided to try the method for reed attachment and reed positioning described by Liz Heine in her article “My Fan Reed Journey” on pp20-24 (search for fan reed pink scarf to find Liz’s YouTube video describing her process).
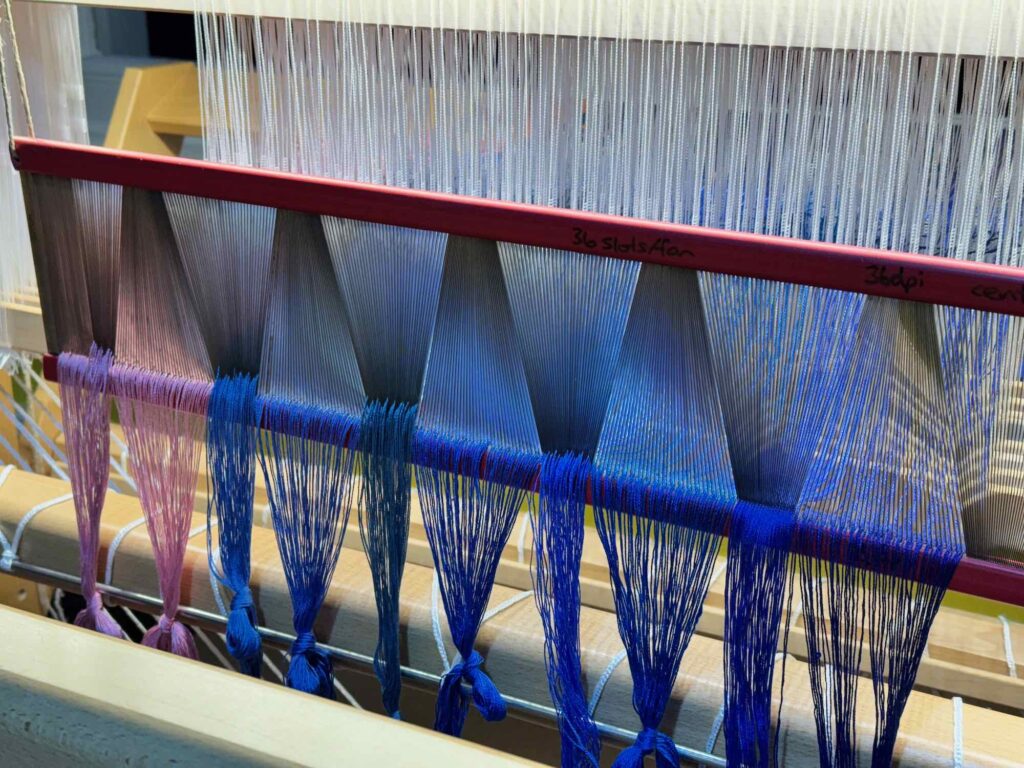
The first step in the process was to prepare the warp. I took out the reed and all of the 20/2 silk yarns in shades of blue and pink. After trying various combinations, I decided to use 10 yarns in the order pictured below (the order zig zags from the yarn at the top of the reed to the yarn at the bottom) – each colour will fill an entire fan, with the left hand yarn being half fan and half straight and the right hand yarn (dark blue) in a fan. This will give me a straight pink edge and a scalloped dark blue edge.
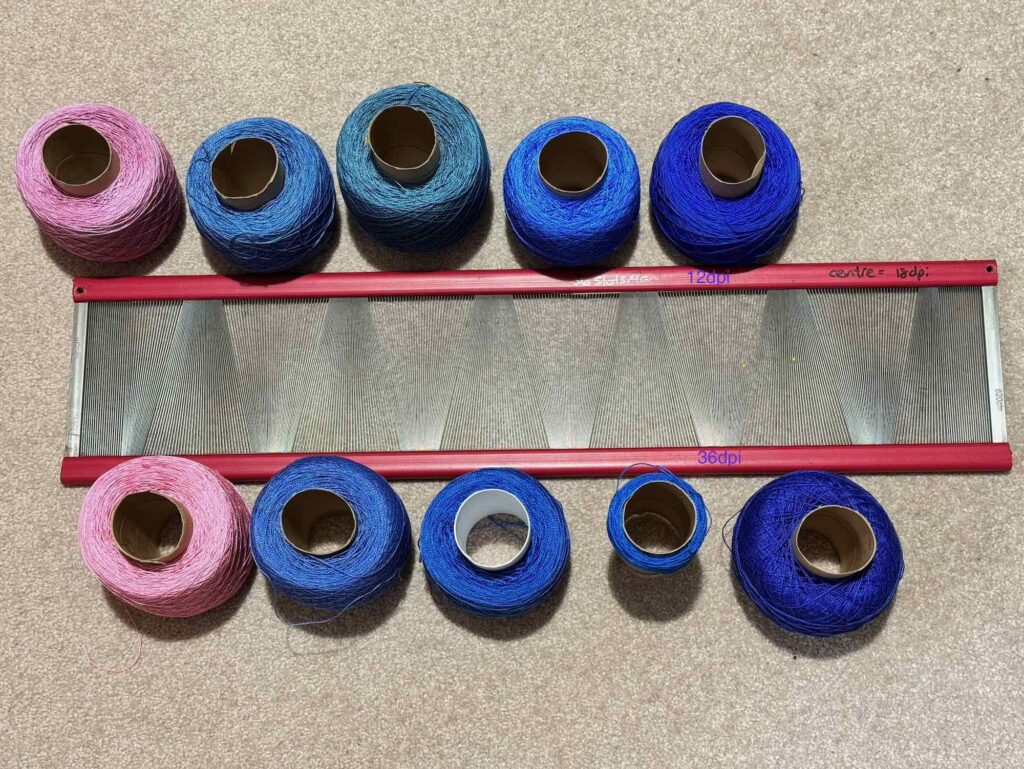
Warp yarn – 20/2 silk in 8 shades of blue & 2 shades of pink; one shade per fan.
Weft yarn – Either black or white 5/2, 16/2 or 60/2 cotton (sampling is required to determine which I prefer).
Calculating the amount of warp required:
There are 36 slots in each fan; they vary from 36dpi at the narrow end to 12 dpi a the wide end and are 18dpi at the centre.
I looked through previous projects that have used this same yarn as well as several sett recommendation charts and found suggestions ranging from 22epi for lace, 26epi for plain weave and 30epi for twills. As this is to be a plain weave wall hanging, the fabric can be quite firm.
I decided to begin with 27epi as this would mean sleying 1,2 ends per slot; ie 3 ends for every 2 slots. This means I need 54 ends of each colour of yarn (36 slots/2*3), giving me 540 ends in total.
In order to figure out the length of warp required, I had to do more thinking. I need to do a few samples in order to figure out the best way to use the fan reed (number of picks per vertical reed position, weft colour and size). I want the final piece to be about 30cm long (when turned on it’s side, this will be the width of the wall hanging), so I need to weave about 40cm to allow for shrinkage. The fabric will be about 20″ on the loom (this direction will be the length of the final wall hanging).
I decided on a warp length of 2m – I want to weave 2 pieces of 55cm (40cm + 15cm total fringe length) + sampling + loom loss, take-up etc of 50cm.
SUMMARY
Warp length = 2m (2 x 55cm pieces + sampling)
Wind 540 ends in total – 54 ends of each of 10 colours; wound with 2 ends in hand
Reed = fan – 18dpi at centre, 36 slots per fan
Sley 1,2 ends/slot = 27epi at centre of fan.
Raddle – spread 4,6 per dent (20″ total, 2″ per colour)
Weave in plain weave.
Threading = straight draw (ie from R to L shafts 1-8 repeating)
Tie up = 2 treadles – 1,3,5,7 & 2,4,6,8
Treadling = 1,2 repeated as required.
Frequency of vertical movement of the reed needs to be determined – I will begin with moving it 1cm every 4 picks.
WARP PREPARATION
I wound two balls of each yarn colour and then proceeded to wind the 54 ends of each colour required for the warp.
The warp was then removed from the mill and wound onto the warp beam. This was followed by threading the heddles.
In order to sley the reed, I put it in the beater and sleyed it as I would normally do. Not surprisingly, it is easier to sley in the wider areas of each fan.
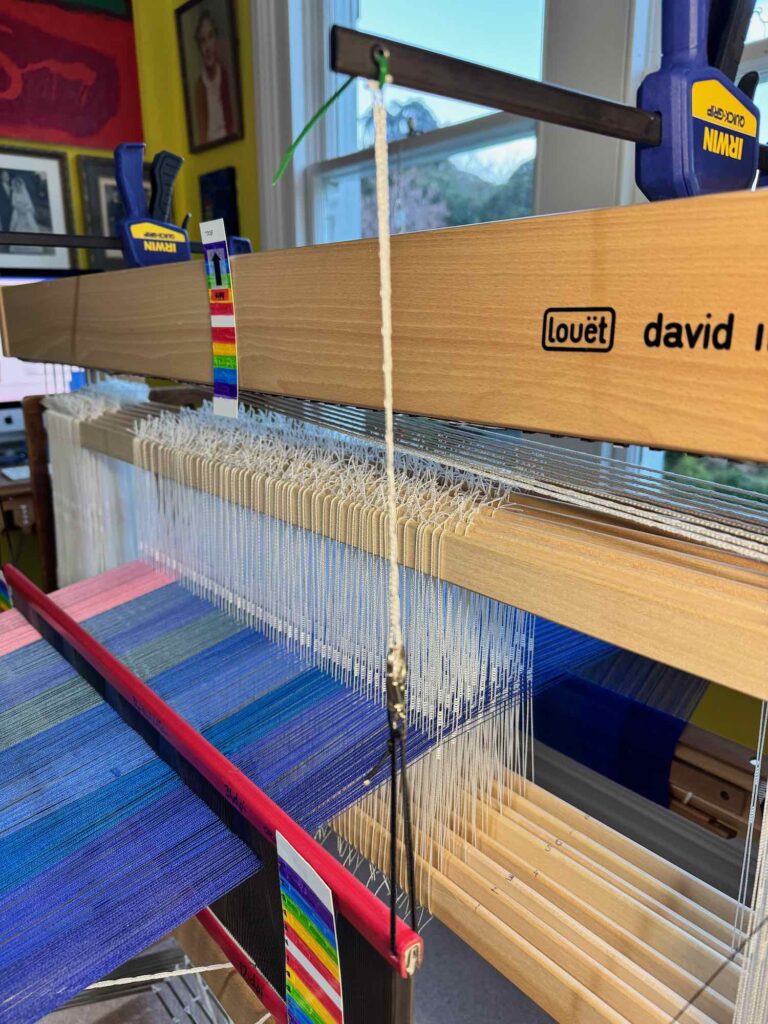
Once sleying was complete, I removed the reed from the beater and suspended it with string from clamps attached to the castle of the loom.
REED PREPARATION
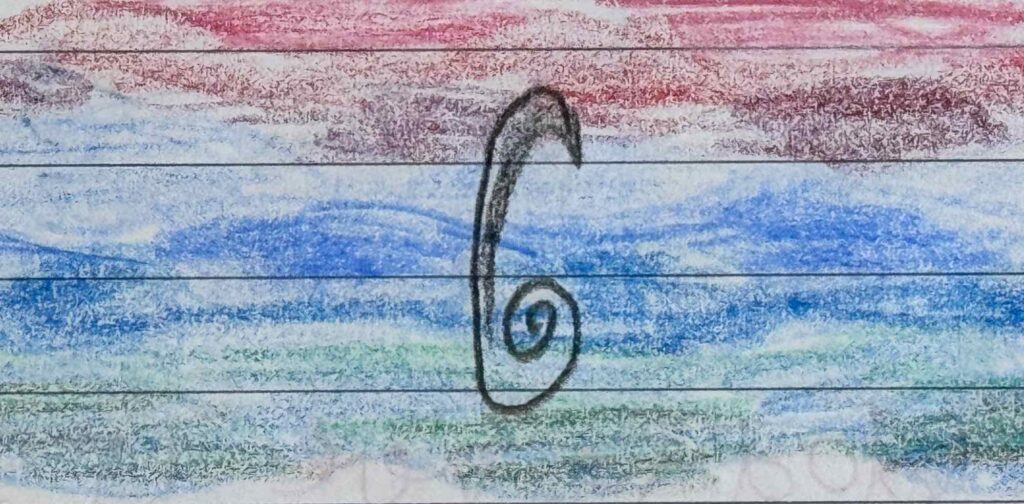
I made coloured indicator cards that will help get the vertical positioning of the reed correct as I weave. I used marker pens to make coloured bands and marked with a black marker every 1cm (approx the centre of each coloured band). I then cut the coloured card into 3 sections – one for each end of the loom (with the 1cm markings) and the 3rd to use for tracking the movement of the reed.
Husband helped with the suspension of the reed from the clamps (see 1st image below). The warp is quite high in the reed when it is held at the neutral position by the stretch of the hat elastic (see 2nd image below). This is because I have a sinking shed loom, so when the shed opens downwards, I will have a large space for throwing the shuttle.
I then blu-tacked the movement indicator cards to the sides of the reed and the tracker card to the castle of the loom.
Finally, I checked for threading & sleying errors using the treadles, wove the header and hemstitched using black 16/2 cotton. This is my weft starting point as I feel it is likely to be my preferred weft yarn and so less sampling may be required.