I calculated that to end with a piece of fabric that was ~145cm in length, I would need to weave 31 pattern repeats (each is ~4.5cm) with purple weft (~139.5cm) and the 2 blue borders (~9cm).
I started weaving the cloth for the first half of the final garment by hemstitching on 2 picks of plainweave and weaving a single pattern repeat in blue as the border. I then wove 31 pattern repeats with the purple weft yarn and a final repeat of blue weft before hemstitching in 2 picks of plain weave.
I then left a 10cm gap and wove the second piece of fabric in the same way as the first.
The length of each pattern repeat was checked after weaving it to ensure it was ~4.5cm so that I could adjust my beat as required and marked every 10 pattern repeats with a knitting stitch marker.
I found that it took about 10 minutes to weave a pattern repeat – this means about 11 hours of weaving + 3 hours for hemstitching (~45 minutes per end for 4 ends).
Once the second piece of fabric was completed, I found that I had sufficient warp to weave another piece of fabric consisting of 2 pattern repeats. I wove this using blue weft and no hemstitching (instead, at each end, I wove 8 picks of plain weave using waste yarn).
The fabric was then cut from the loom and the smaller piece of fabric zigzagged on the sewing machine to secure the warp edges.
The next step was to cut the pieces of fabric apart. For this, I folded the fabric in half lengthwise, placed a metal ruler against the hemstitching and used a rotary cutter (along the other edge of the ruler) to cut the fringes. This was very fast and resulted in lovely straight, even fringes.
The three pieces of fabric were then hand washed in warm water, rinsed in cool water and spun in the washing machine (medium speed) to remove excess water. Loose ends (where new yarn was joined) were trimmed, the fabric pressed with a hot iron and laid flat to dry.
Once again, the blue merino yarn shrank a lot more than the kid mohair/merino blend. In the table below, all measurements are taken about 10cm up for the hemstitching and 5cm in from the selvedges.
| Pre-wash (width x length) | Post-wash (width x length) | |
| First piece | 64.5-65.5cm x 144cm | 65.5-66cm x 141-142cm |
| Second piece | 64.5-65cm x 145-146cm | 65-65.5cm x 143-143.5cm |
| Third piece | 64cm x 10.5cm | 60.5cm x 9cm |
Now that the fabric had been woven, I needed to create the garment.
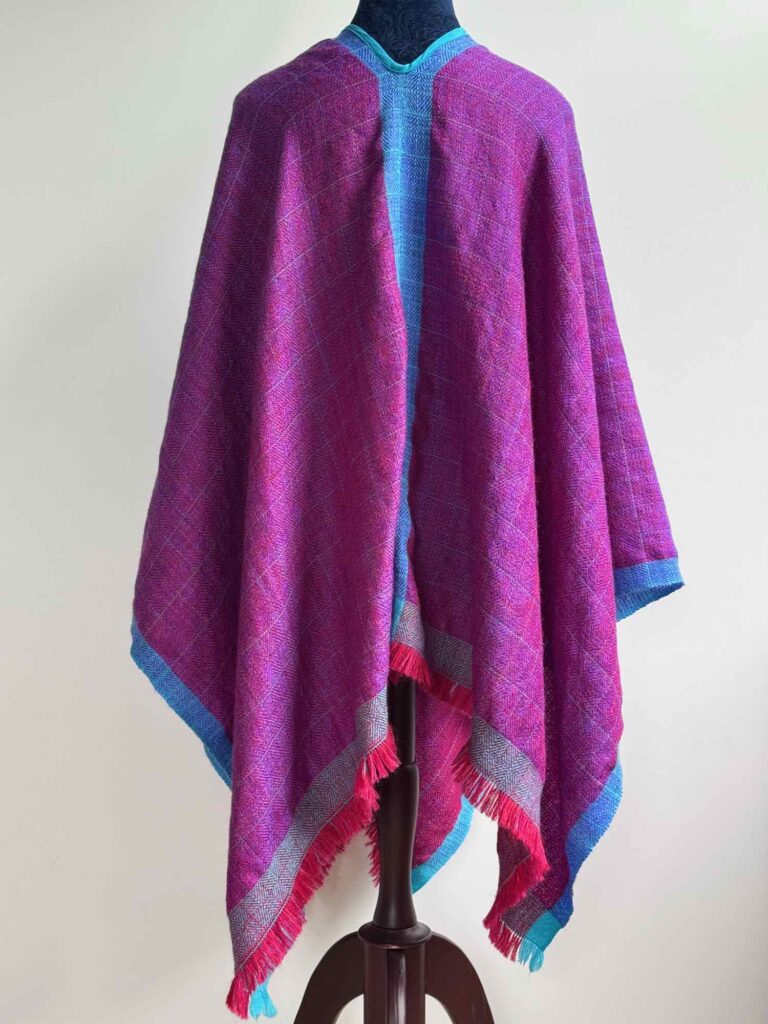
First, I marked the halfway point of the fabric with safety pins and laid the 2 pieces of fabric side-by-side to see on which ends of the fabric the pattern repeats were the most similar in size. This meant that I would be able to stitch the halves together down the centre back while matching the zingers between pattern repeats without too much stretching of pattern repeats to make sure that the zingers lined up.
I pinned the fabric halves together using safety pins (so as not to snag the fabric on pins) and began to stitch the two halves together using ancient stitch (p31 “Finishes in the Ethnic Tradition” by S. Baizerman & K. Searle, 2019). I took care to match the central diamond and the zinger of each pattern repeat. I stitched the seam so that it ended about 10cm below the halfway markers. Once stitched, I wet the finished steam and pressed with a hot iron and left the seam to dry.
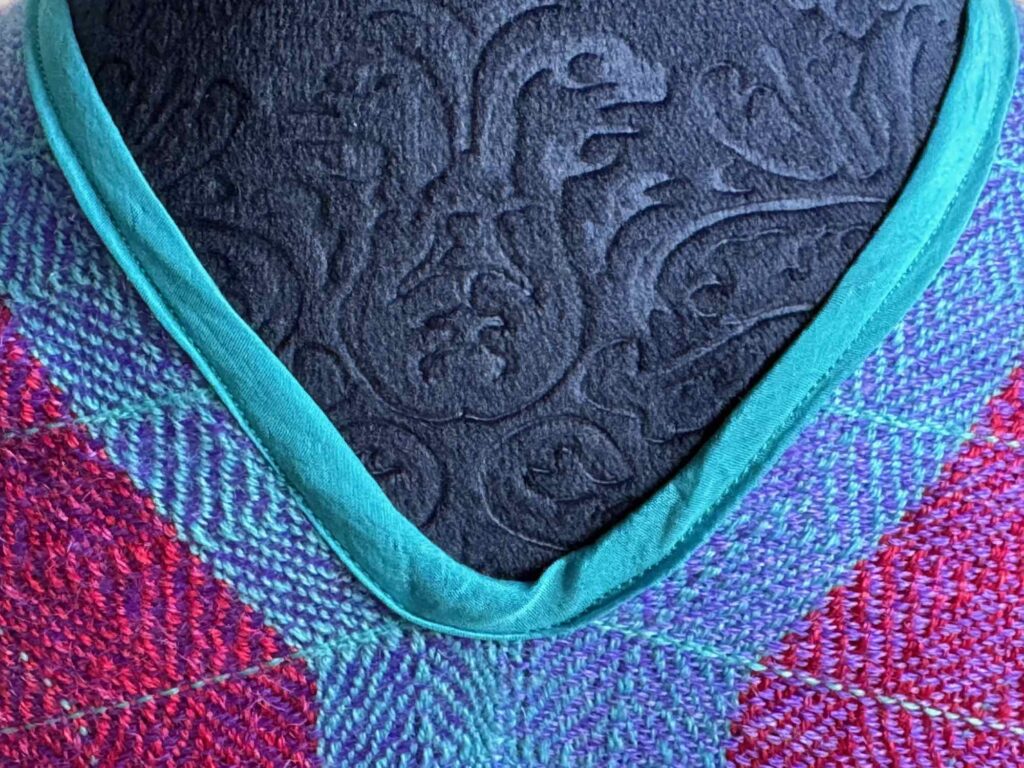
The join at the top of the seam requires strengthening, so I consulted a sewing friend for the best way to do this. She suggested making some bias binding and sewing this onto the handwoven fabric. I rummaged in my fabric box and found some sky blue silk from an old sleeping bag sheet that was the same colour as the blue yarn used in the borders and zingers. Using the internet, I found how to make bias binding and how to sew it to the fabric. After much cutting, pressing and pinning, I used my sewing machine to stitch the bias binding onto the handwoven fabric. The join sits at 3 pattern repeats below the top of the shoulder when the garment is worn and the binding covers the join at the top of the seam and continues for 4 pattern repeats on each side.
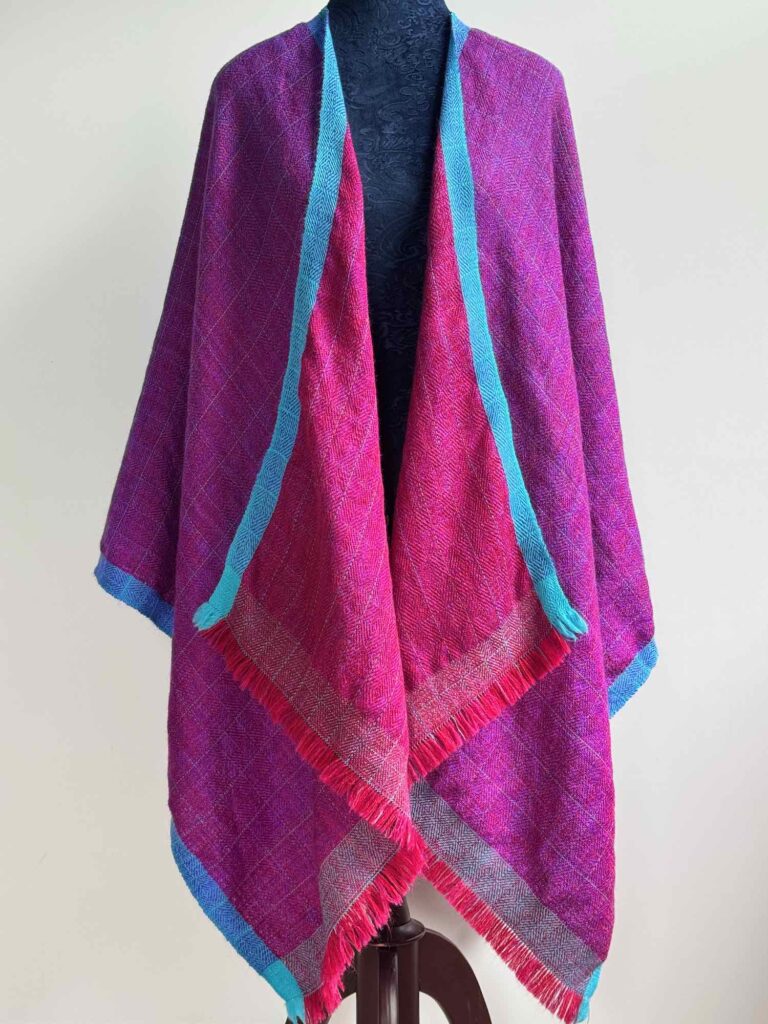
Depending on the way the purple side of the fabric is viewed in the light, the overall colour appears to change from purple to red. This colour change is not as obvious on the red side.
I am very pleased with the way that this piece has turned out and will enter it for exhibition at the Eastside Gallery in the “Brilliant Vibrant People” exhibition in April. The theme states “Vibrantly colourful works inspired by brilliant people, be they real, imagined or historical”. This piece was inspired by mother’s love of bright colours, soft fabric, sunsets and raspberries. I am calling this piece “Raspberry sunset” (raspberry for the red side and sunset for the purple side).